Setting Up Your Spore Sensor
Estimated time: ~5 minutes
Step 1 — Plug In
Connect Spore to any USB Type-C power source (5V, 1A minimum). The LEDs will blink to indicate startup.
Step 2 — Connect to Spore's WiFi
On your phone or laptop, join the WiFi network:
- Network: Myco-Monitor: Spore
- Password: sporerul8
Spore enters Access Point mode automatically on first boot.
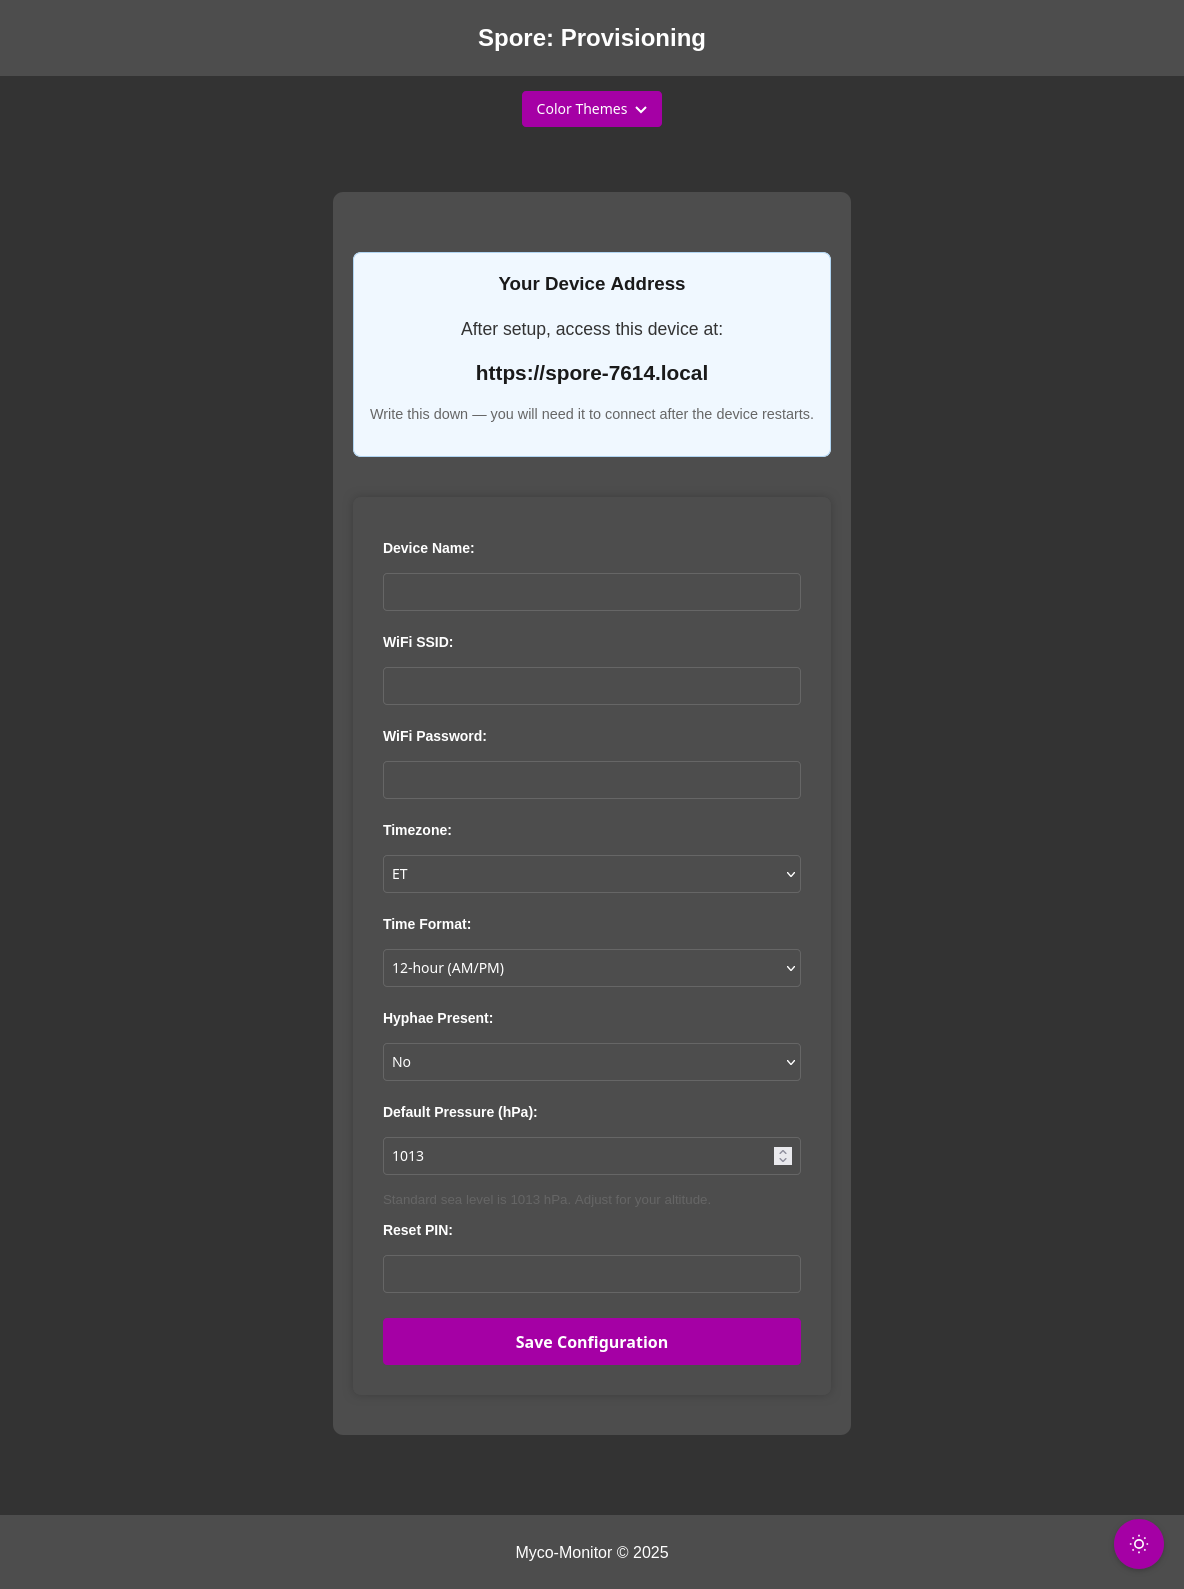
Step 3 — Open the Setup Page
Navigate to https://192.168.4.1 in your browser. Accept the security certificate when prompted. Your device's mDNS name (e.g., spore-0042) will be displayed on the setup page — write this down, you'll need it to access your device after setup.
Step 4 — Configure Your Device
| Device Name | Give it a name (4–12 characters), e.g., "Purple-1" |
| WiFi Network | Enter your home/farm WiFi name and password |
| Timezone & Time Format | Select your region |
| PIN | Create a 4–8 digit PIN (needed for calibration and OTA updates) |
| Hyphae Integration | Choose Yes if pairing with a Hyphae controller, No for standalone use |
| Default Pressure | If standalone, set ambient pressure (standard sea level: 1013 hPa) |
Step 5 — Spore Connects
The device reboots and joins your WiFi network automatically.
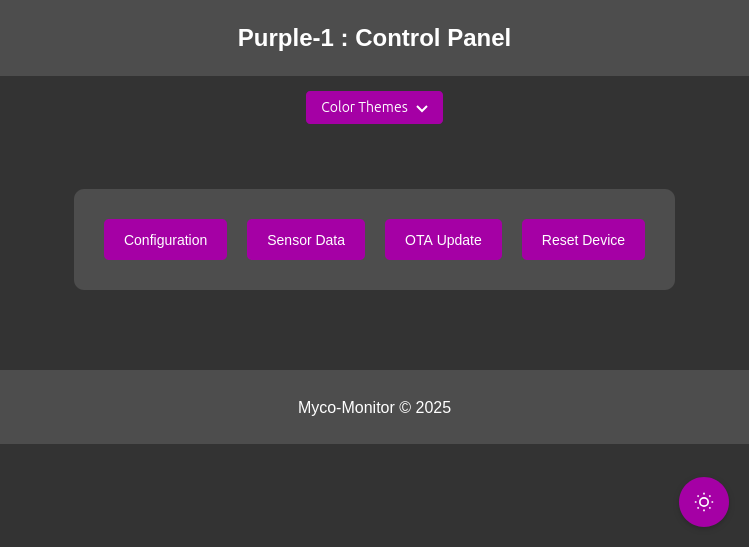
Step 6 — Access Your Dashboard
Open https://spore-NNNN.local (the mDNS name shown during setup) or find the device's IP address on your router.
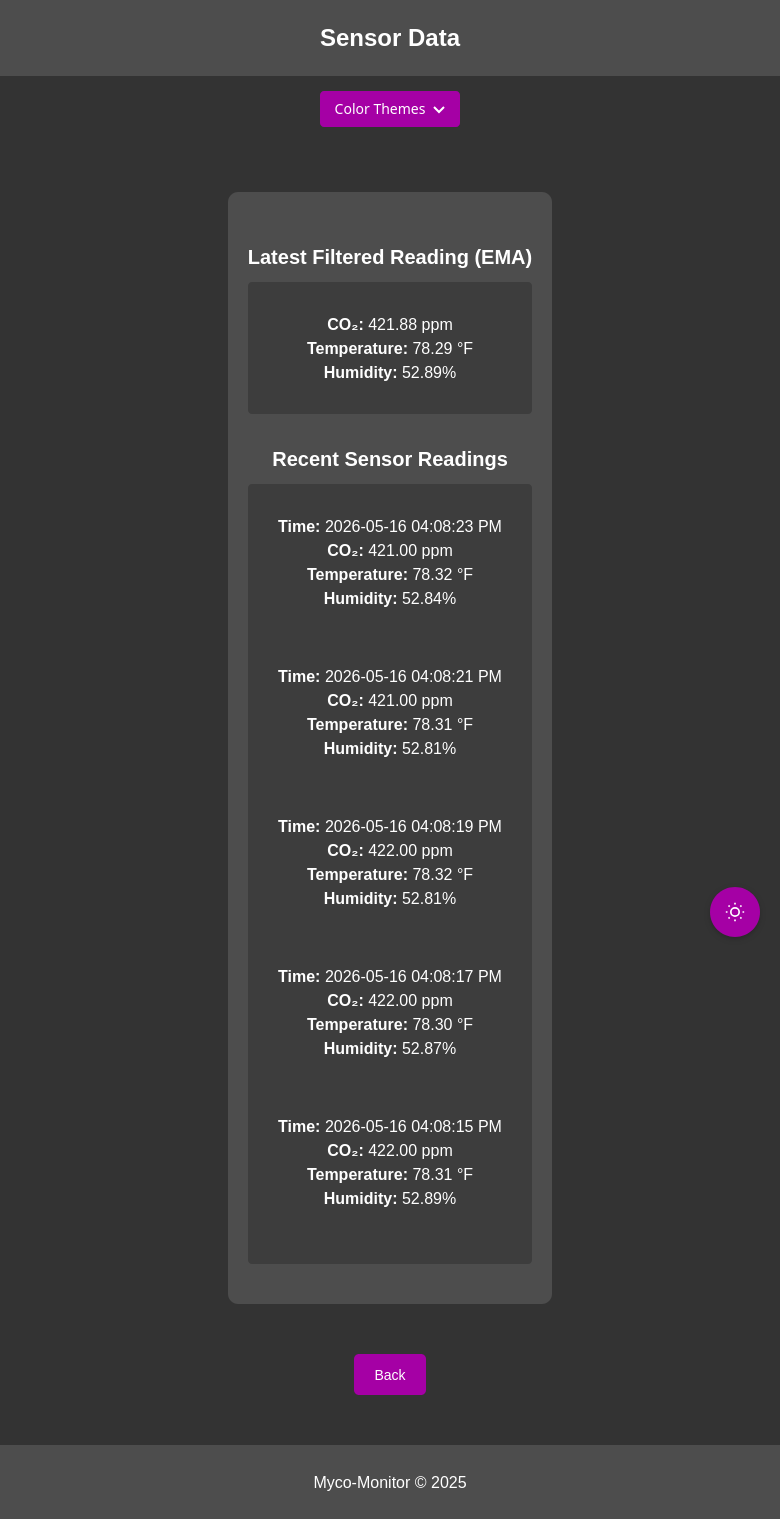
Step 7 — Start Monitoring
Real-time readings appear on the dashboard. Data is filtered and smoothed automatically.
Tips
- Allow 5–10 minutes after power-on for the CO2 sensor to stabilize
- The device name you set is a display label — the mDNS hostname (spore-NNNN) is fixed at manufacturing and matches the device's TLS certificate
- If
spore-NNNN.localdoesn't resolve on your network, use the device's IP address directly (check your router's connected devices list) - For more help, visit www.myco-monitor.com or join our Discord